
- Turn of power to the boiler
- Install the VR33 Module on the left hand side as shown
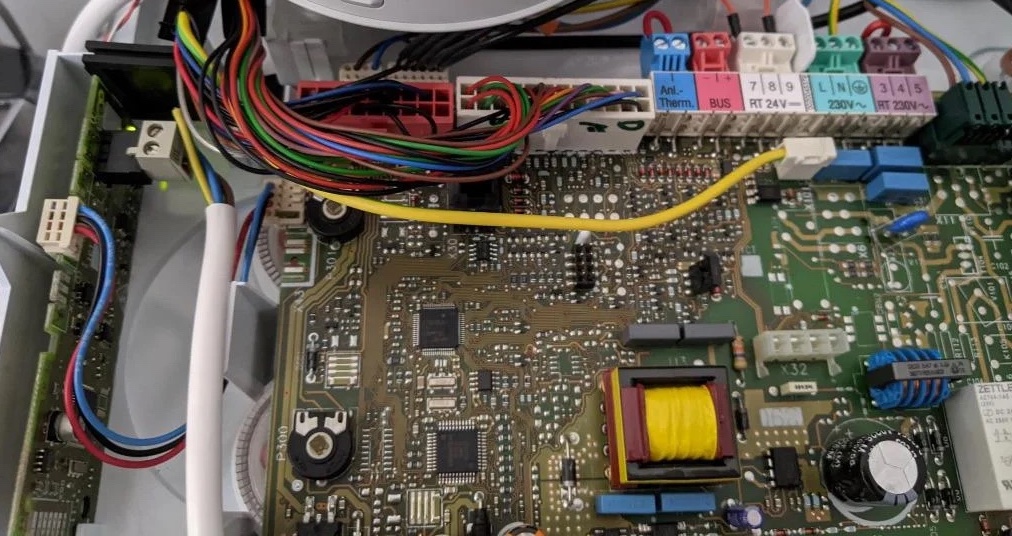

Your PCB may vary depending on the model.
3. Connect VR33 X32 to PCB X31. Please note sometimes the correct connector may vary, see the installation manual to determine latest connector.
4. Link the 24v connection on the PCB with link wire as was provided in the factory supplied state. The connector names vary, but it will be either 24V RT, or a number ie 7,8,9
5. Connect your OpenTherm thermostat to the OpenTherm connector on the VR33 Module.
6. Turn on power to the boiler
Green lights on VR33 Module will flash. To confirm the correct connection you may go to the settings menu and check D.90 (see manual on how to see D.90 for your specific boiler model) for confirmation of recognition of the Ebus VR33 Module.
7. Enable the OpenTherm connection from your specific thermostat should it be required if it is not automatically detected. ie Nest Thermostats need you to go into the Pro Setup menu.
Other Resources